A Tour of R Studio
R and R Studio are really two diffrent things. R is a statistical programming language and an ecosystem of packages. Historically R was used on the command line and users would open up multiple terminal windows for different purposes, arranging them together on their monitor.
R Studio is an Integrated Developement Environment (IDE) for R. An IDE is really just a tool that brings several components that are useful for working with a programming language. It is entirely possible to work with R successfully using only the command line in your terminal and many people do work that way. However, most people find it easier to user an IDE like R Studio.
To get started, start R Studio. If it doesn’t start you off with a project, go to
File/New Project…. Then click New Directory, New Project,
enter learning_R as the Directory name: and click Create Project. The R
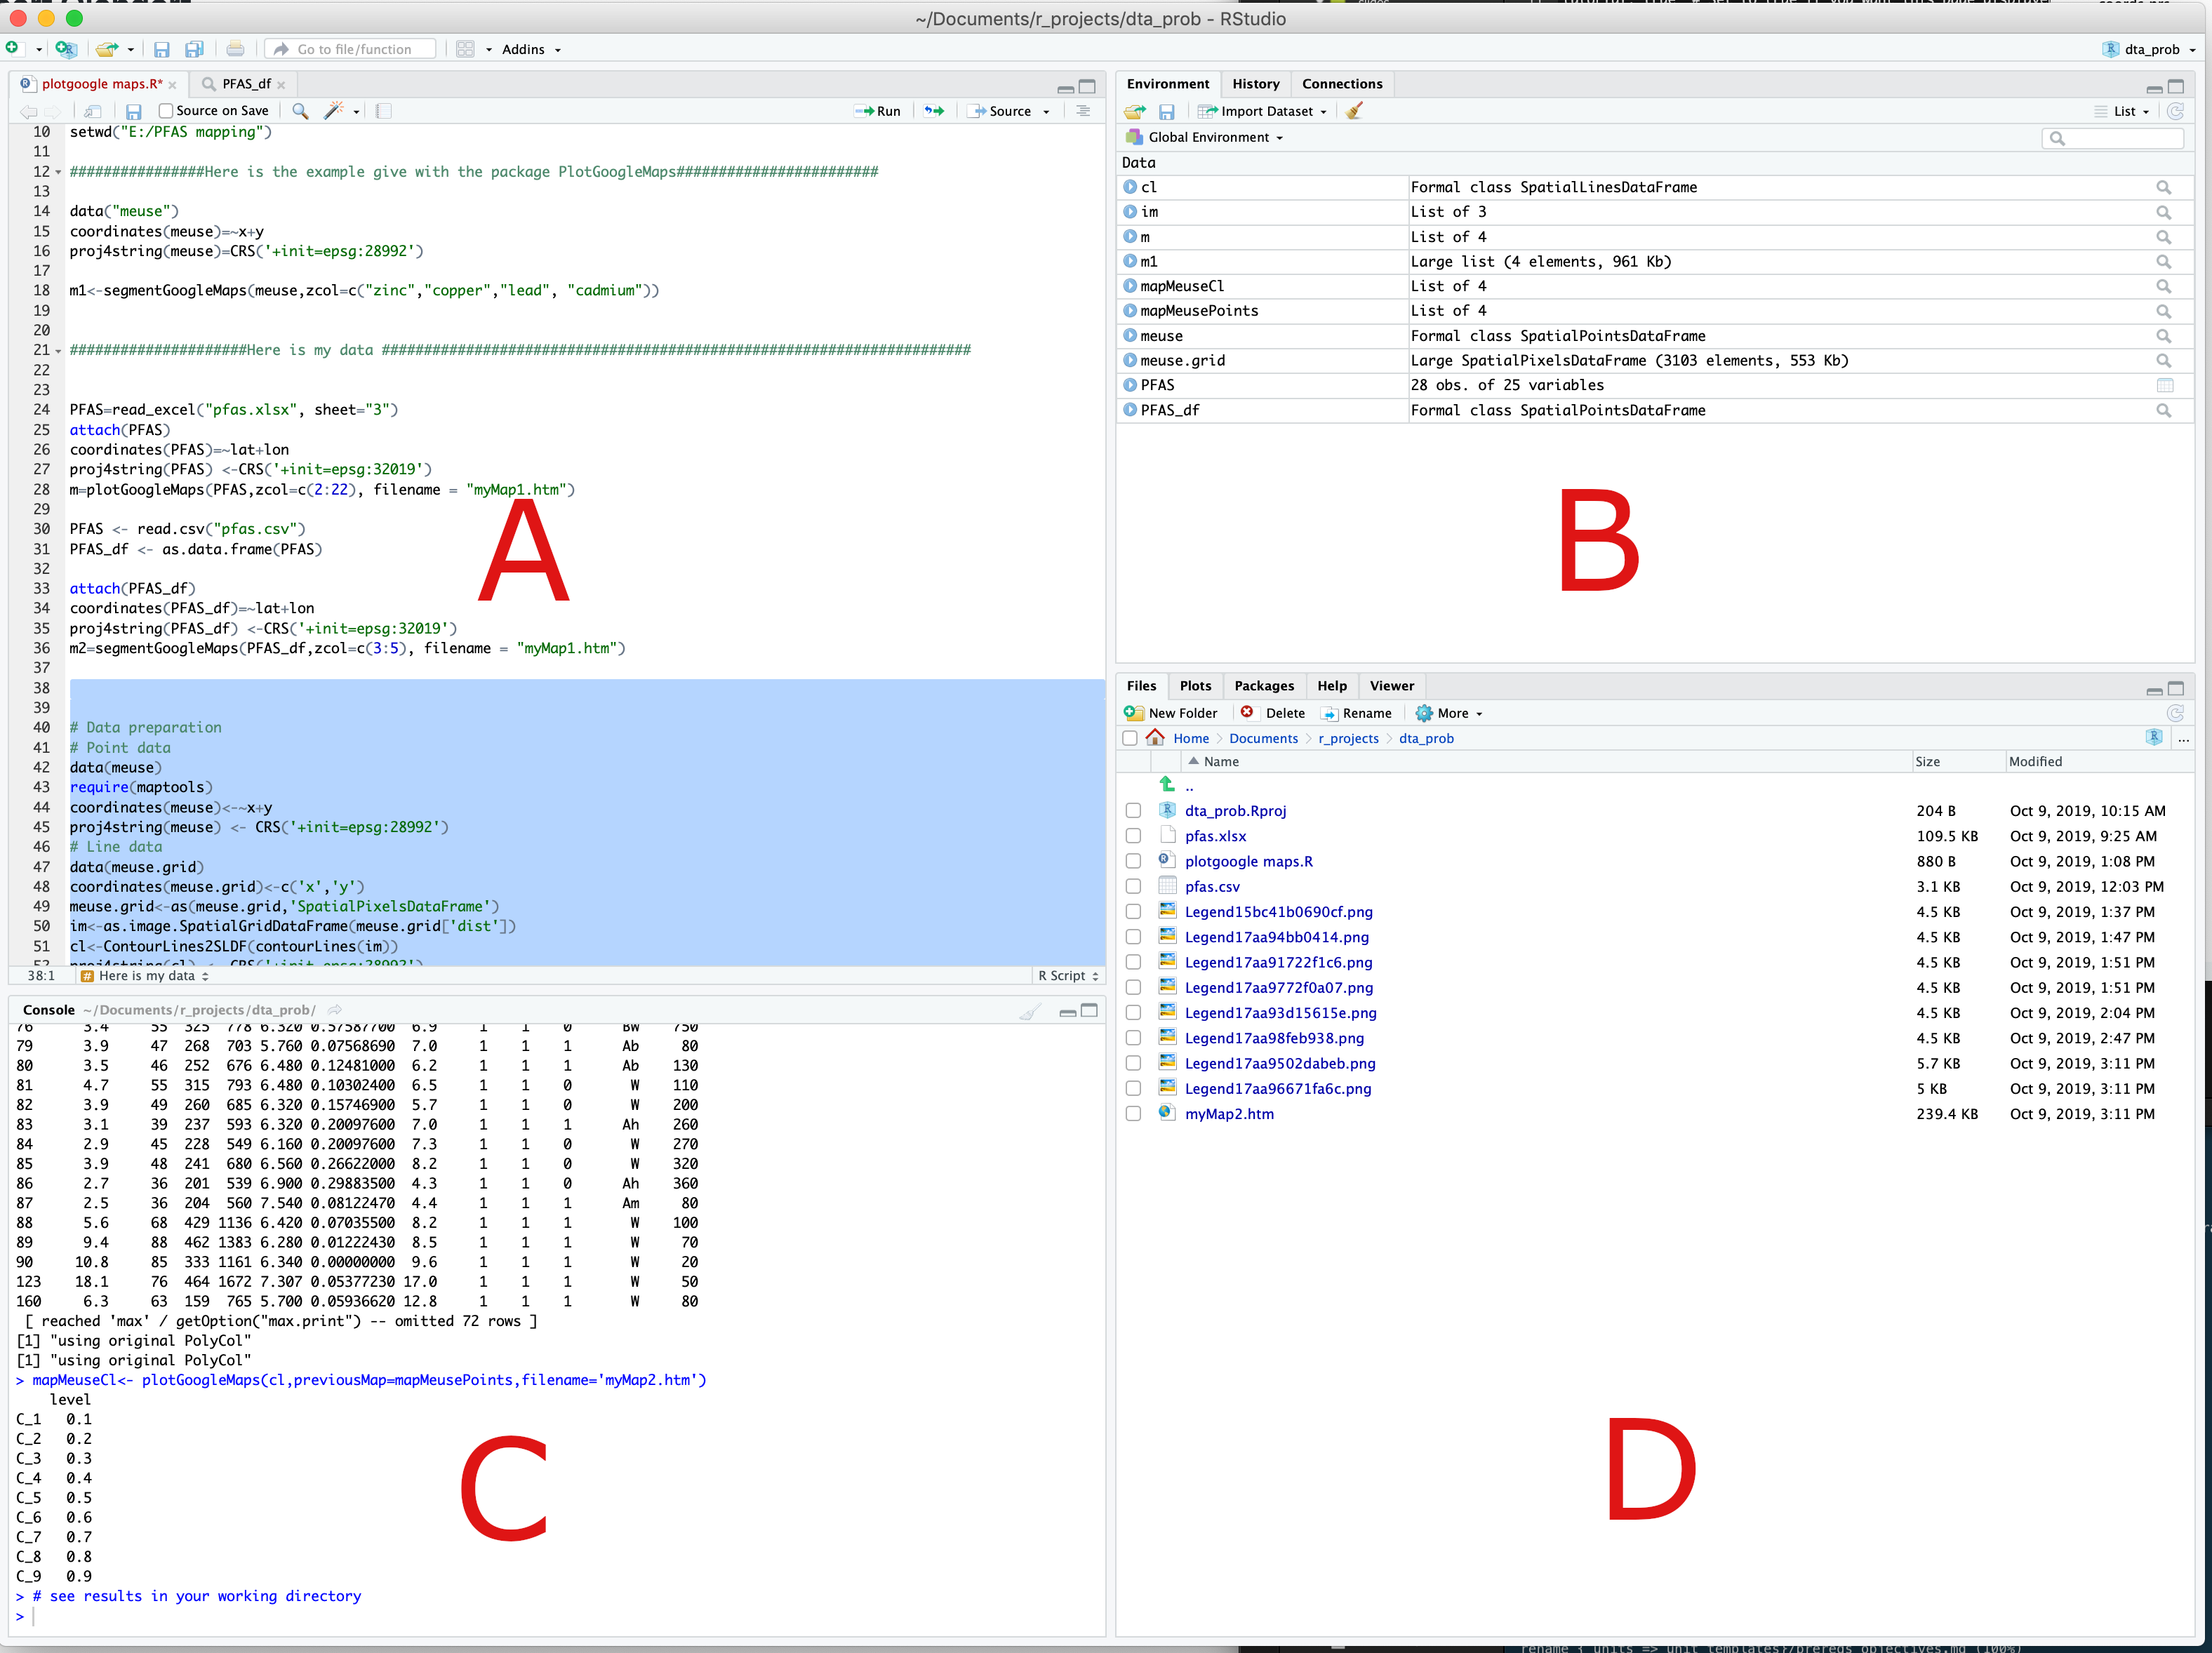
Studio environment can be divided into four regions, labeled A, B, C and D (fig. 1).
Each of these areas have a broad function, most of them with several tabs. We’ll go
through each one quickly to get us started.

The Console
The first area to look at is the console (Area C). This is your primary way to interact with R and is exactly the same as typing R commands into a terminal. We’ll be working with this a lot, but to try it out try typing the following into the prompt.
> 1   # Type this in
[1] 1  # The response.

> 1 + 1
[1] 2

> 1 == 1
[1] TRUE
Script and Data Viewer
You may not have an Area A yet. To see it click the small green plus icon
 at the top left
of the window and choose R Script. You’ll see a blank script document. Whereas
you run commands in the console one by one, you can collect these commands
into a script and rerun them all any time you like. Type the following into your
script then click the Source button

NOTE: You need to use the
print()function to tell R to write the result to the console.
print(1)
print(1 + 1)
print(1 == 1)
You can also run a script line by line. Click on any line to put the cursor then and
click the Run button
 .
You will see only that result ouput.
Environment and Memory
Area B displays primarily things that are stored in the computer’s memory. Memory is the ephemeral information that a computer keeps while it is running. In contrast to a computer disk, flash drive or similar devices, information stored in the memory is lost when you close a program or turn the computer off. R actually saves these values to disk when you close R, so long as you save your environment when closing though. Values assigned to variables, data and many other things are stored in memory. Also the history of your interactions with the console are shown here. To try it out type the following into the console.
> var <- "This is my variable"
Click on the Environment tab if it isn’t already active. You should see that
the text has been committed to memory and assigned to the variable named var. If you
click on the History tab, you will see a record of all the things you have typed into
the console. We won’t be exploring the Connections tab, but it keeps track of
various database and other external resources you may have connected to.
Storage
Area D mostly handles things that are stored on your disk drives and other storage devices. These persist even when you close R or turn your computer off. There are several tabs here. We’ll interact with them all during the tutorial and just touch briefly on them here.
- Files:
- lists and allows you to interact with the files in your project directory.
- Plots:
- shows your recent visualizations and plots. These are not stored as files but are actually in memory.
- Packages:
- Shows what packages you have installed. If the checkbox is checked, then it is also loaded into memory and ready to use. More on packages later.
- Help
- Displays the help files associated with the different functions and packages you will be using.
- Viewer:
- Displays other types of content you may generate, such as web pages.
Page 1 of 10